Our major restoration project London County Council No. 1 has been making some really good progress in recent weeks. Over on our Facebook page we recently shared a video of the restored trolley bases being refitted to the roof of the tramcar, and now our latest blog takes us inside the tramcar as we explore one of the key stages of the restoration with the main electrical traction wiring being installed.
Reinstalling the wiring is no easy task, and actually doesn’t start with fitting the new wiring, but goes all the way back to the early stages of the project when we were removing the original wiring.
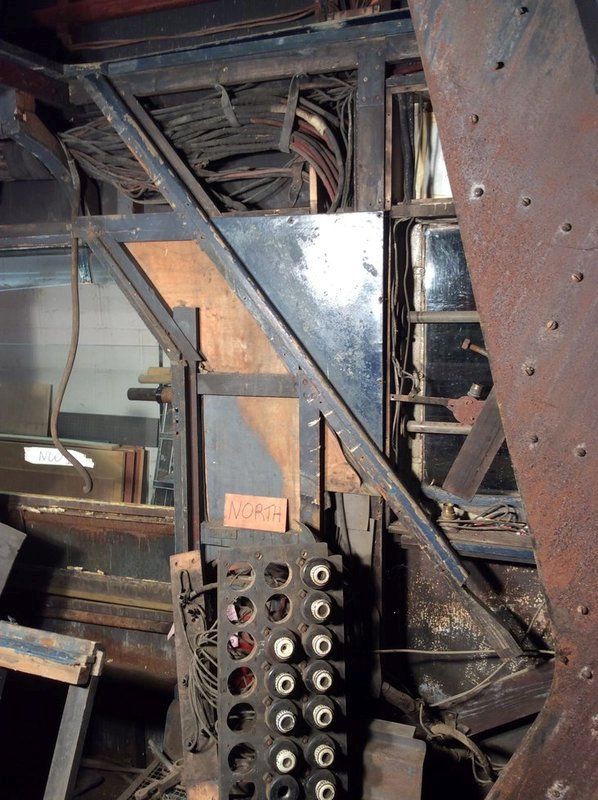
Image taken in March 2015 when removing internal fitting to reveal original wiring.
We didn’t have any original wiring diagrams for the tramcar, so a major part of the project was to track where all the wiring went, what it did, understand modifications made between the tram operating in London and operating in Leeds, how those modifications could be reversed and then how that would effect the rest of the wiring. Once we understood all that, we then needed to produce a new set of drawings to record all the details, before we could even think of putting anything back on the tramcar.
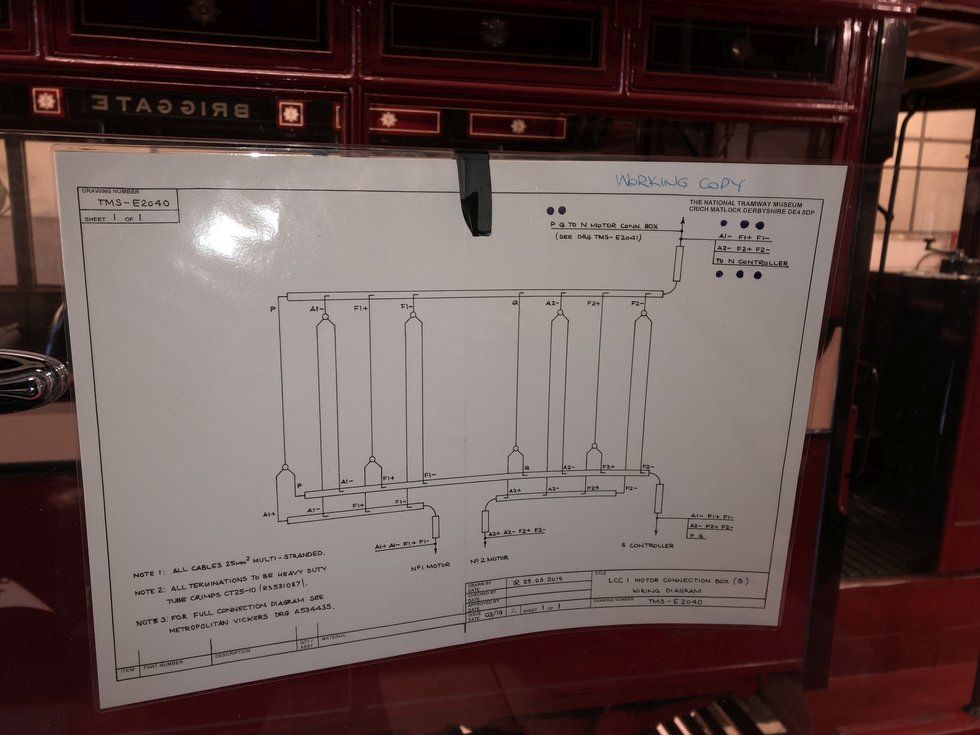
One the drawing produced by volunteer Ian, for the wiring on the London County Council No.1
Sometimes we get asked, ‘can’t you just use the old wires and reconnect everything?’. The simple answer for this is ‘unfortunately not’, there are differences in modern health and safety legislation that means we need to replace the old wiring with modern materials, which will do exactly the same job as the original. As part of the project we keep samples of all the different types of original wiring used, which often gives us clues to suppliers of the original materials.
So, what has been going on lately, well this past week we reached the key milestone of installing the main electrical traction wiring on the tramcar. We’d already quietly been working on the bell and lighting wiring.
The controllers on London County Council No. 1 are quite complex, and therefore there is more cabling present than you might expect to find on some of our other more typical tramcars in the collection.
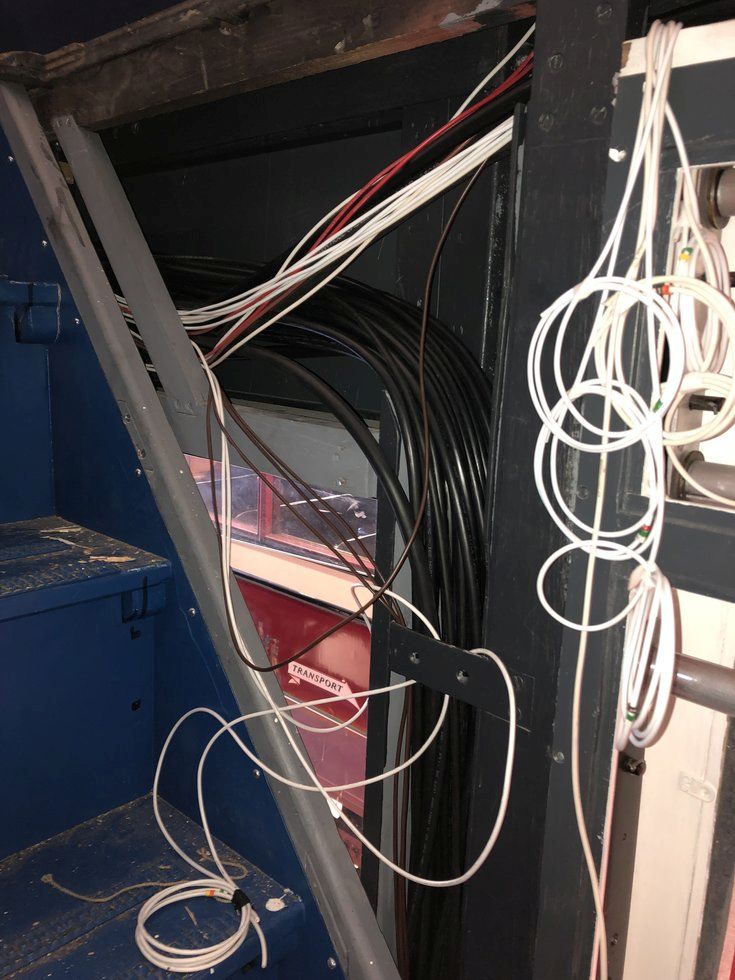
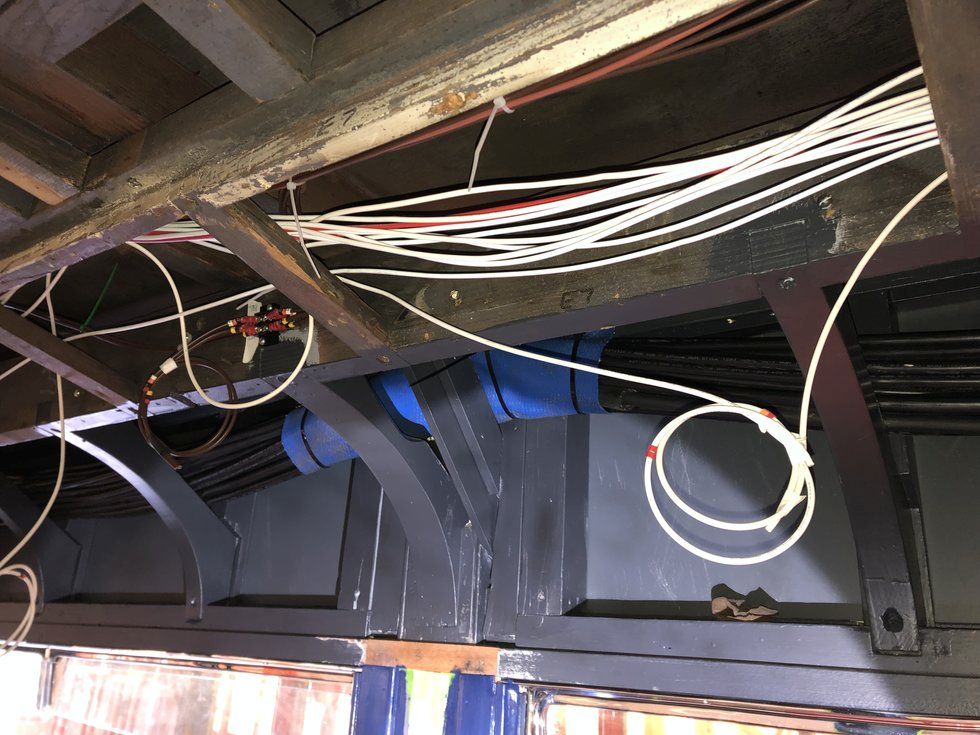
Photo’s above show the complexity of the wiring throughout the tramcar. The thick black wiring is the recently installed traction wiring, whilst the white and brown wiring is for the lighting and electric bell systems.
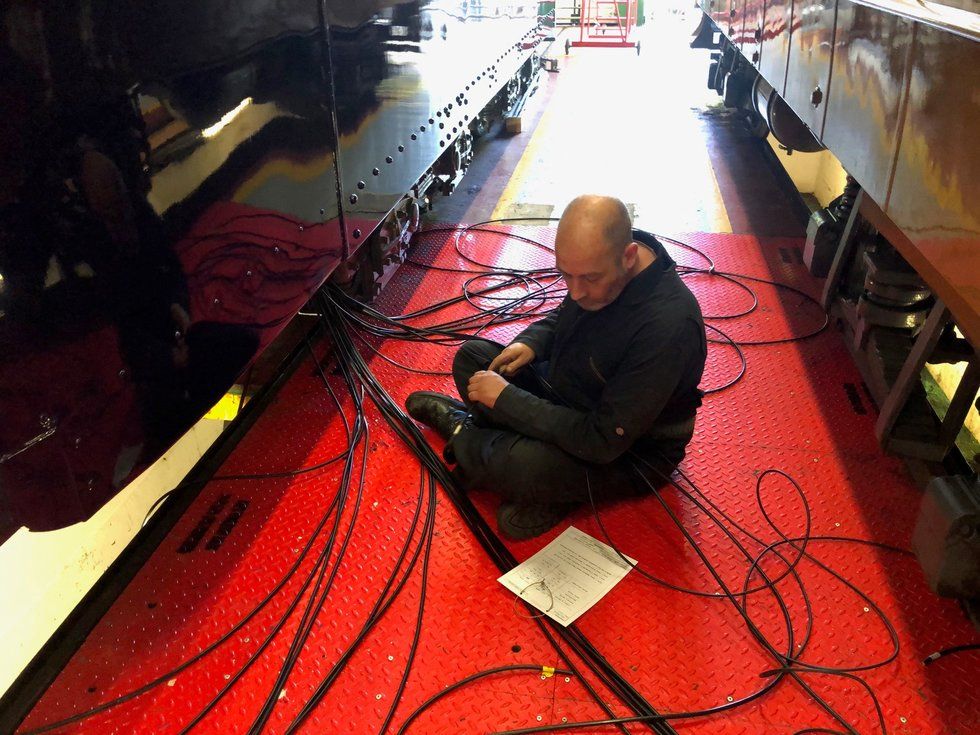
Our volunteers and staff were focused on the wiring that connects the two controllers, the four motors, the four resistance banks and the four track brakes. Most of these are run within the lower deck body sides and within the ceiling; requiring careful threading through the tramcar so that they aren’t damaged.
Once the cables have passed through the tram floor they pass to the underside of the tram. Here they will be run in a protective hose and pass to the controllers or resistance banks. In the photo below, staff member Jason can be seen grouping cables together into the correct bundle.
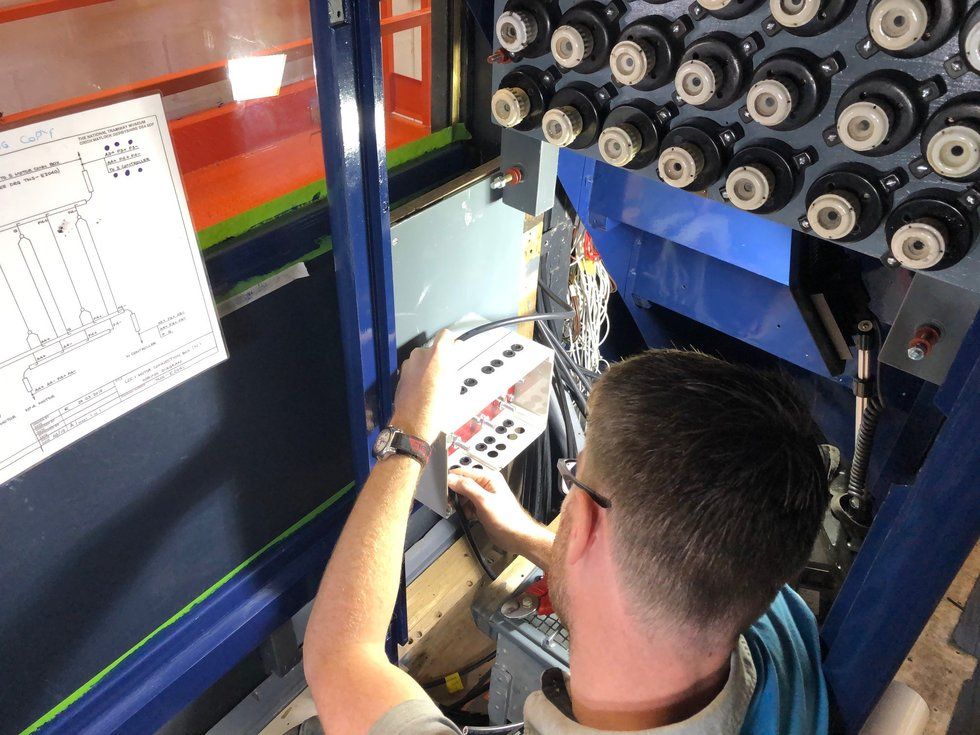
Once all the cables have been installed throughout the tramcar, it all then needs terminating correctly.
The image below shows one of our volunteers Dan working on feeding cables into a motor disconnection box, before cutting back, labelling and terminating. These boxes will eventually be hidden from view, as they are located underneath each of the staircases.
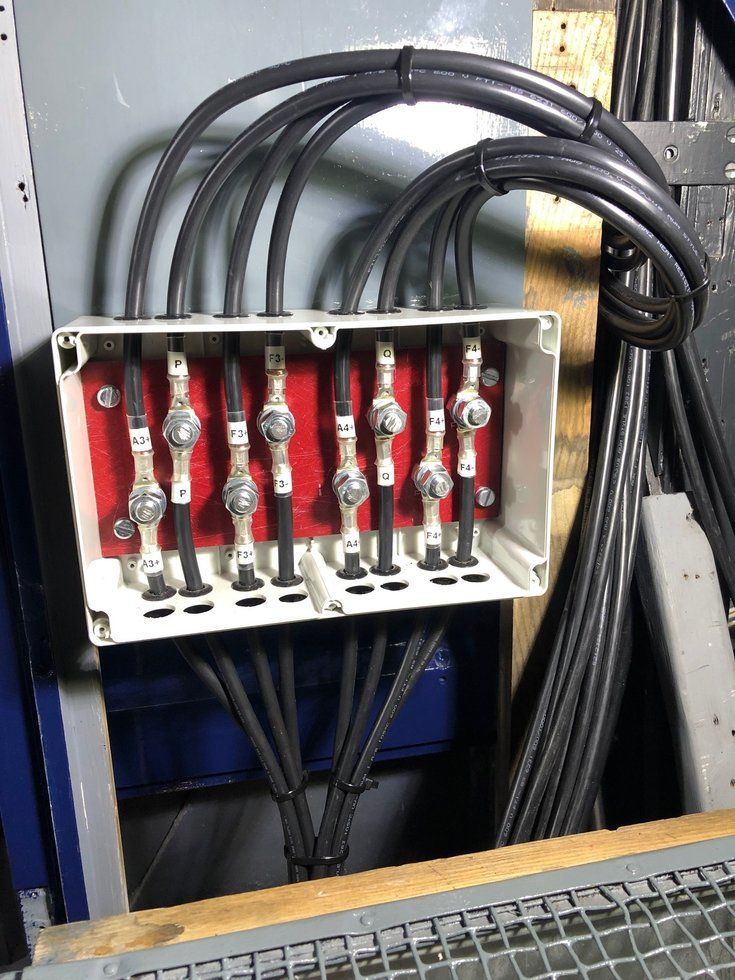
The neatly terminated cables into the motor disconnection box come out looking like the image below. Later once the internal wiring has been tested, the motor leads will go on top of these terminations. These were originally done with soldered ‘T’ joints in the cabling, but this isn’t a preferred technique that we use now.
The wiring is very painstaking work and takes time to make sure everything goes where it needs to, connects to right thing and doesn’t get damaged in the process of being installed. Our staff and volunteers are doing a great job on this and made great progress which will allow us to move on to the next stages of the project.
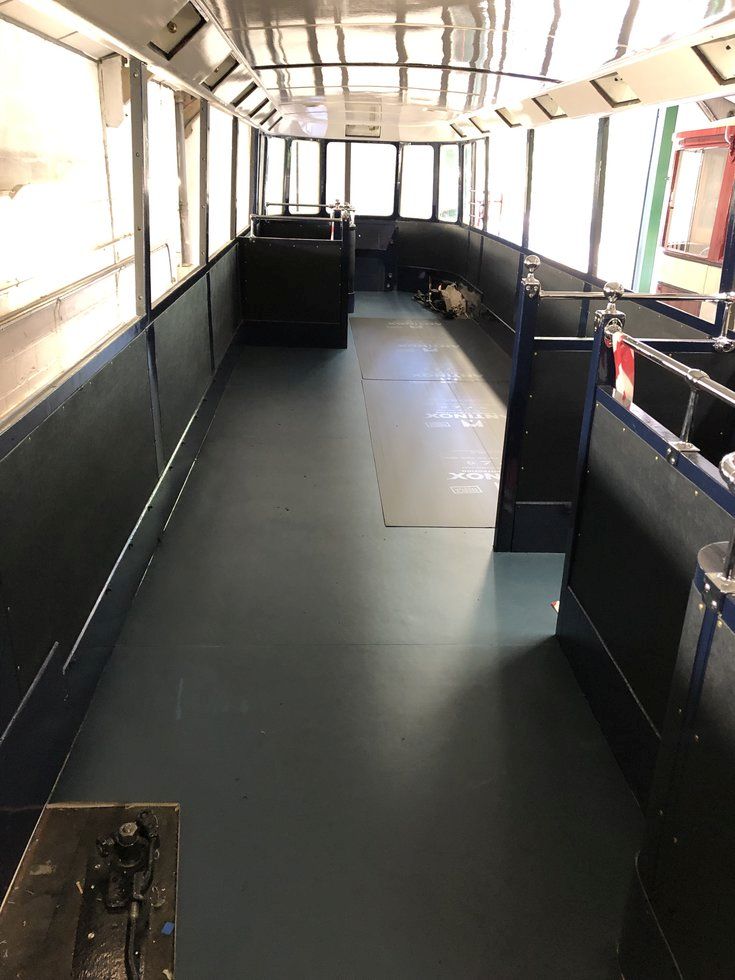
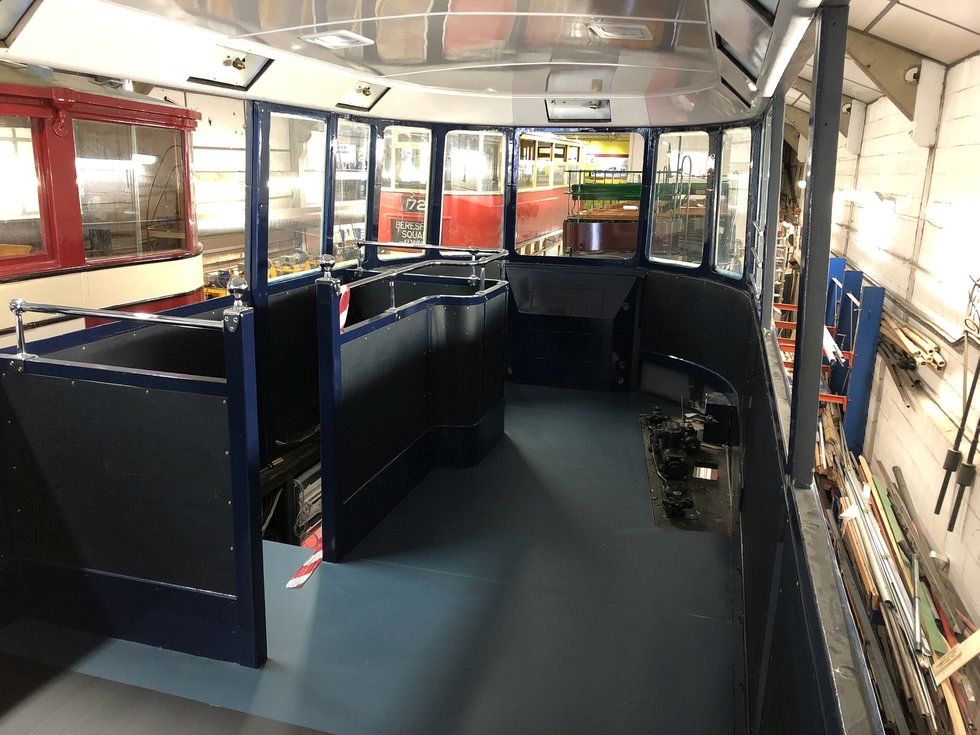
But its not all been about the wiring, the upper deck of the tramcar has also started to look a little different recently with not only more chrome fittings being restored to position, but also the first of the stunning blue lino flooring has gone down. It really transforms the look of the upper deck, and we’re also in the process as well of getting the seat bases ready to be refitted to the upper deck.
All photos courtesy of Dan Heeley, Ian Ross and Crich Tramway Village.